Create and share your live allergen matrix
Published 12 November 2026 · 6 min read
By Tara Beattie, Co-founder of Prepsheets
Your allergen matrix brings together the recorded allergen information for the recipes on your menu, including ingredients used through subrecipes. Use it to view the menu, print a matrix, or give guests a live link and QR code.
1. Open Menu Intelligence
Choose Menu Intelligence from the left-hand menu. Check that On Menu contains the dishes you are currently serving.
Use Add section to organise dishes into sections such as Starters, Mains or Desserts. Choose the section you want to add to, then select recipes from Available Recipes. You can rename and reorder sections, and drag dishes between sections.
Menu changes may also affect connected systems. The example account shows a Square connection, so check the organisation you are working in before changing the menu.
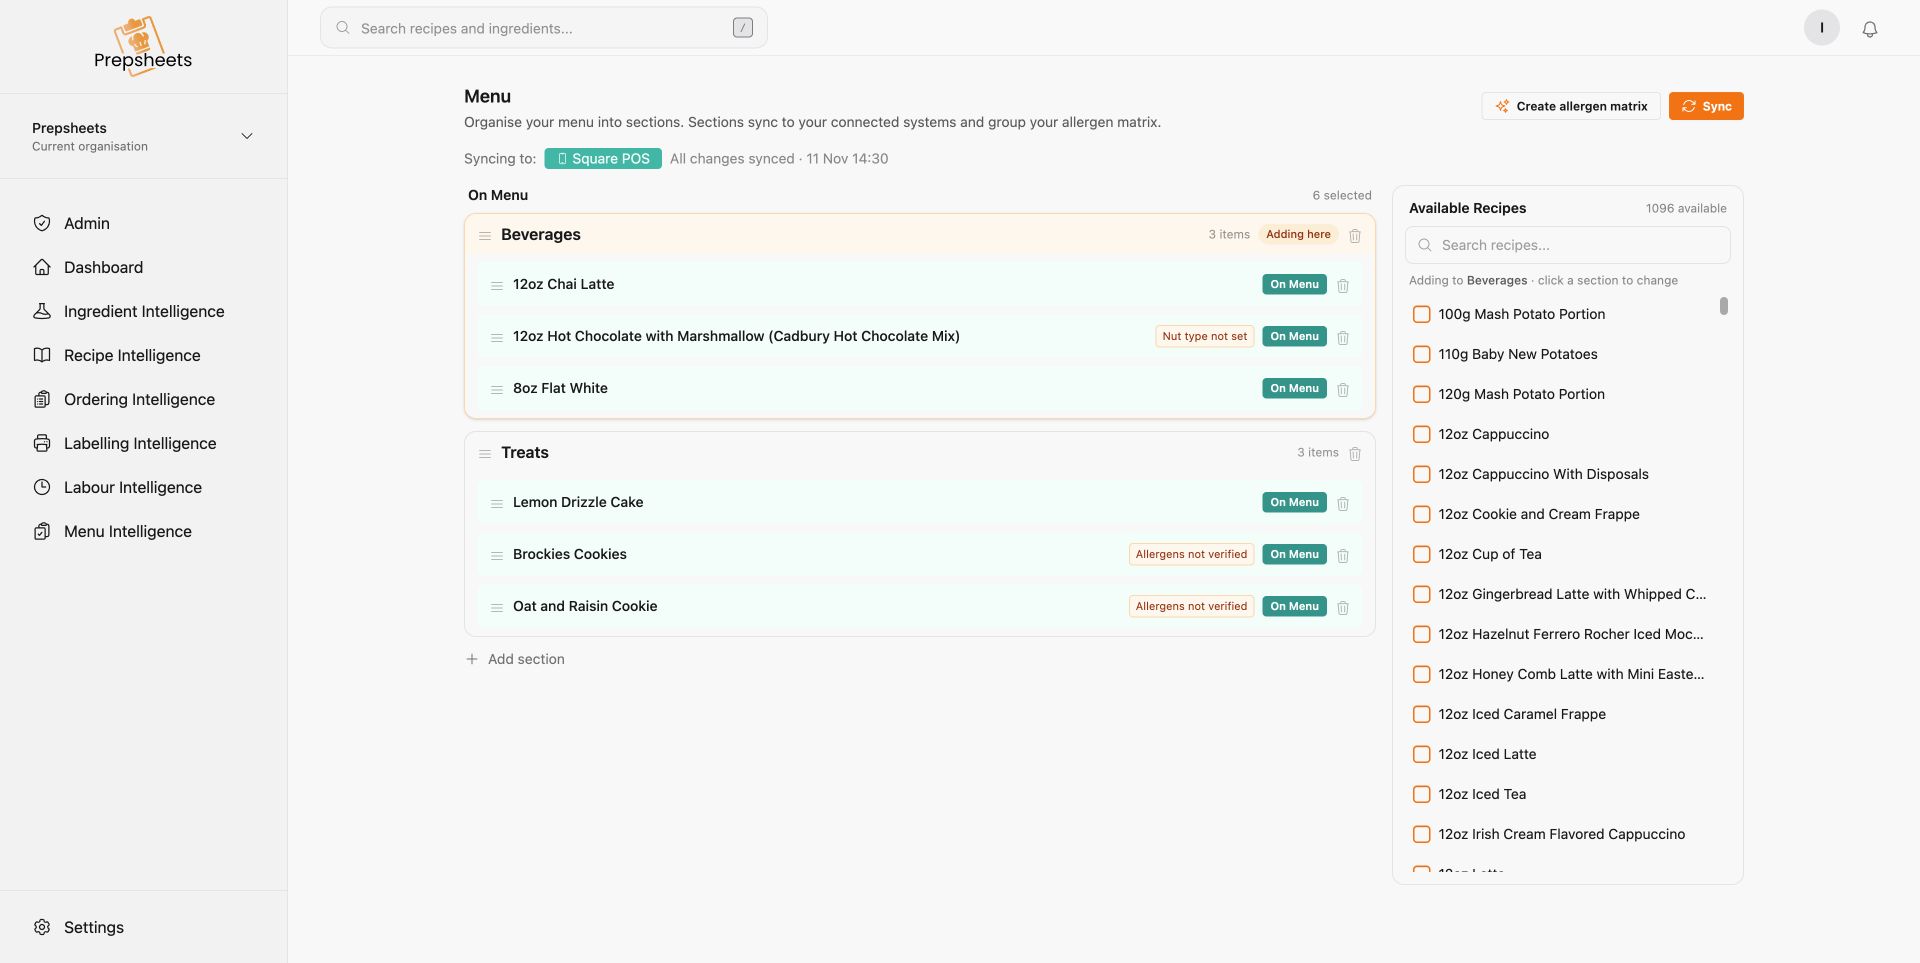
2. Choose Create allergen matrix
The matrix is built from your current menu. You do not need to type a separate allergen table for each dish.
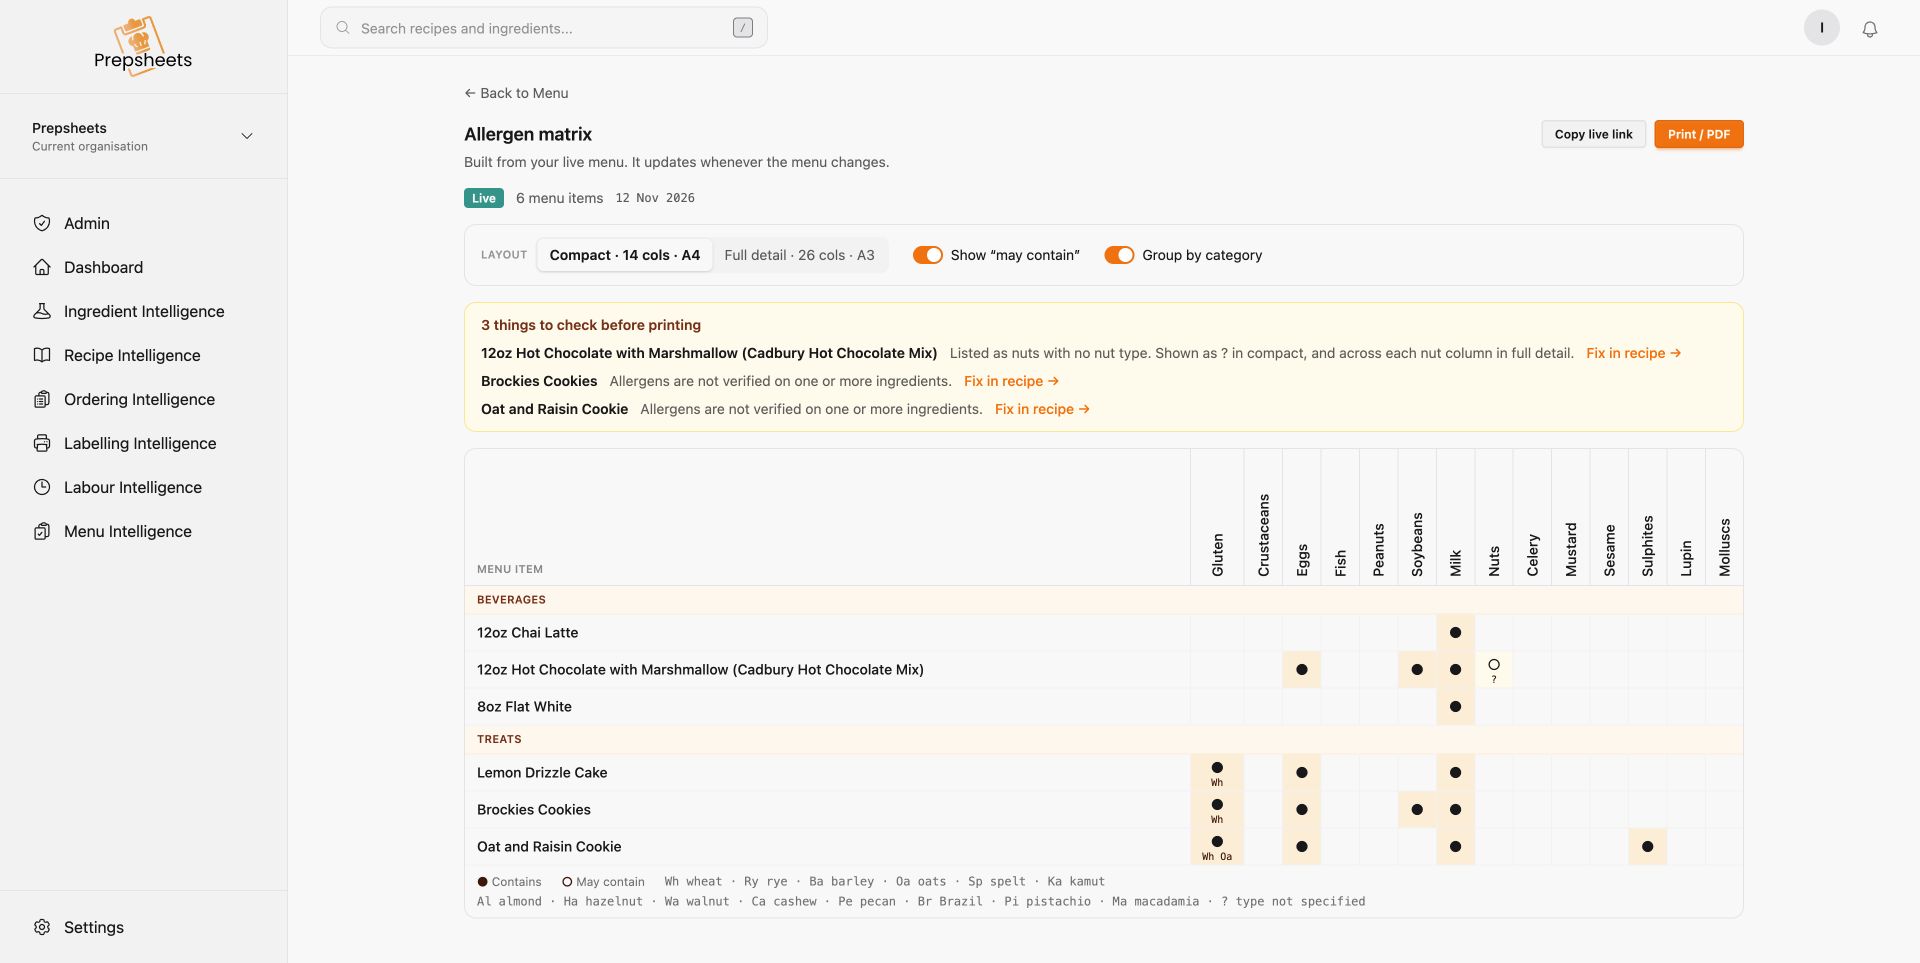
The screen shows the number of menu items, the date and your available layout options.
3. Check the messages above the matrix
If Prepsheets flags something to check, use Fix in recipe to open the affected recipe and review its ingredients and supporting supplier information.
For example, our demonstration account flags ingredients whose allergens have not been verified, and a product recorded as nuts without the specific nut type. These are examples of information to resolve before using your matrix for customers. The screenshots intentionally show those messages; they are not a verified customer menu.
A question mark in the compact layout means the type has not been specified. Where a generic nut declaration has no specific type, the full-detail view marks the nut columns conservatively. Check the source information rather than guessing the missing type.
4. Choose the layout and detail you need
- Compact · 14 cols · A4: a compact overview, designed for A4 landscape printing.
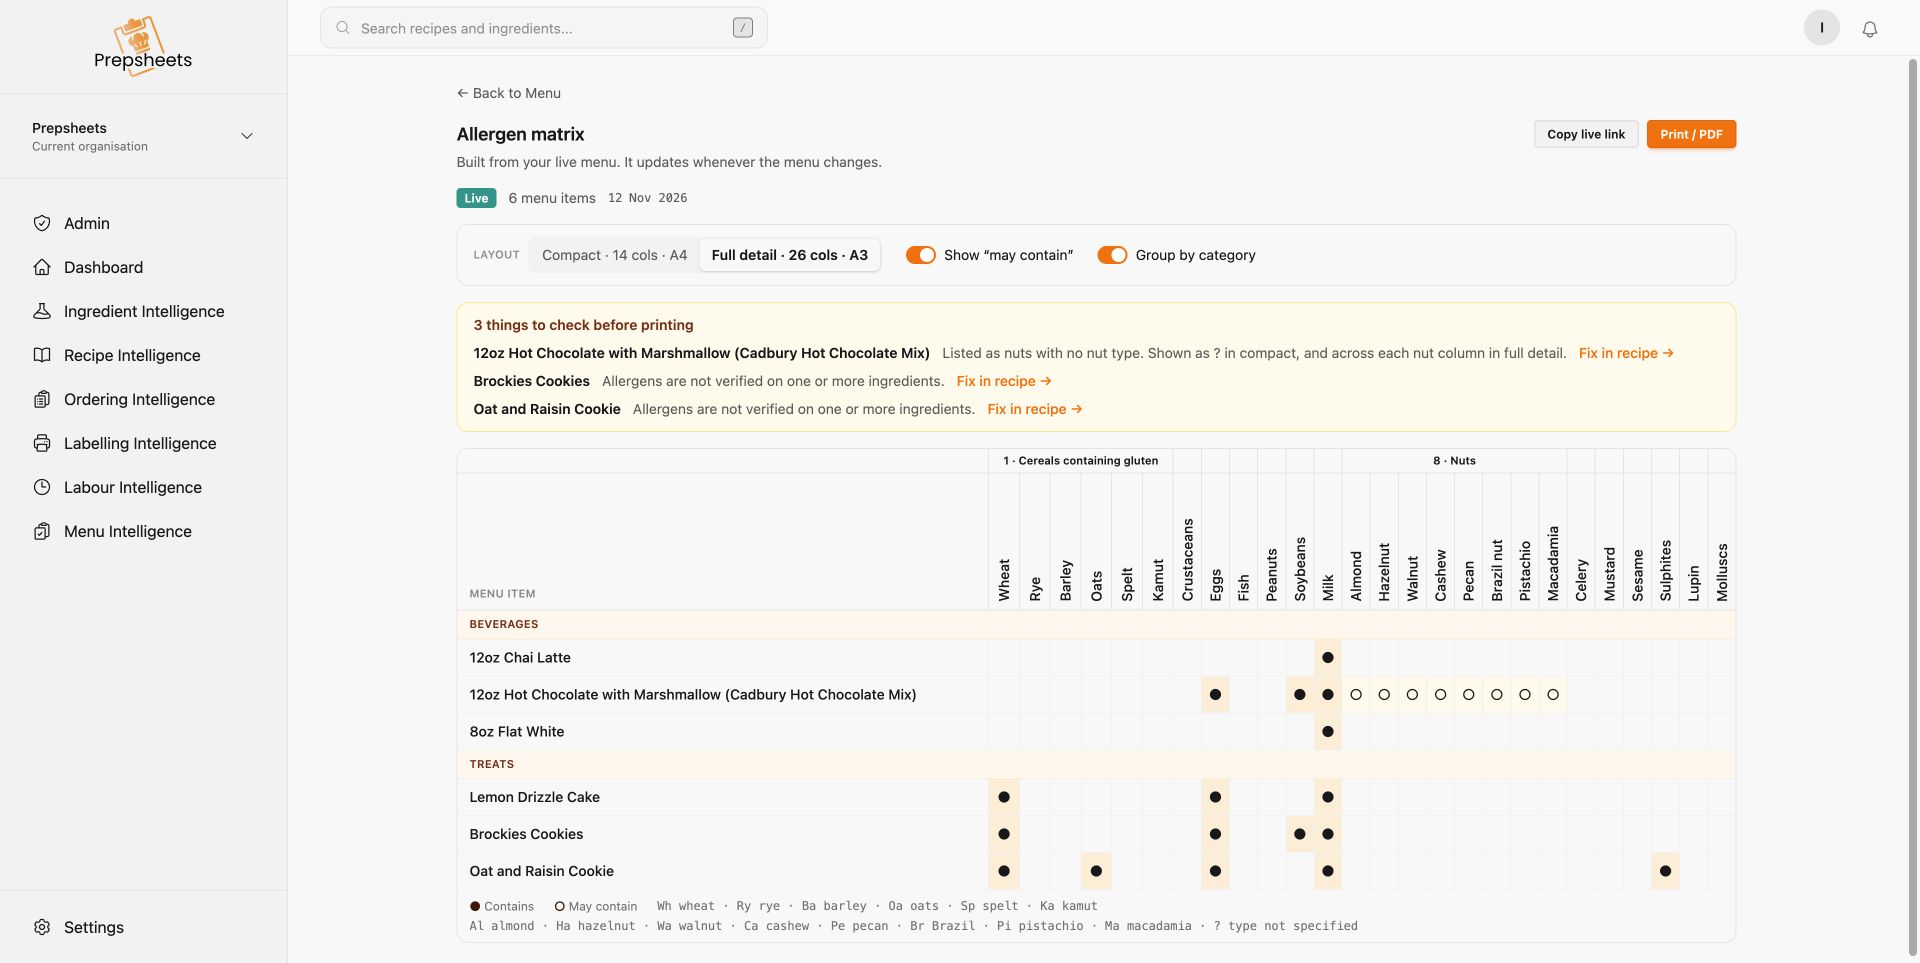
- Full detail · 26 cols · A3: separates the cereal and nut types into individual columns, designed for A3 landscape printing.
- Show “may contain”: displays the recorded may-contain information separately. Turning it off changes the view, not the underlying ingredient declaration.
- Group by category: shows your menu section headings in the matrix.
The legend uses a filled circle (●) for Contains and an open circle (○) for May contain. The compact view includes abbreviations for cereal and nut types; read them using the key beneath the table.
5. Print the matrix or save a PDF
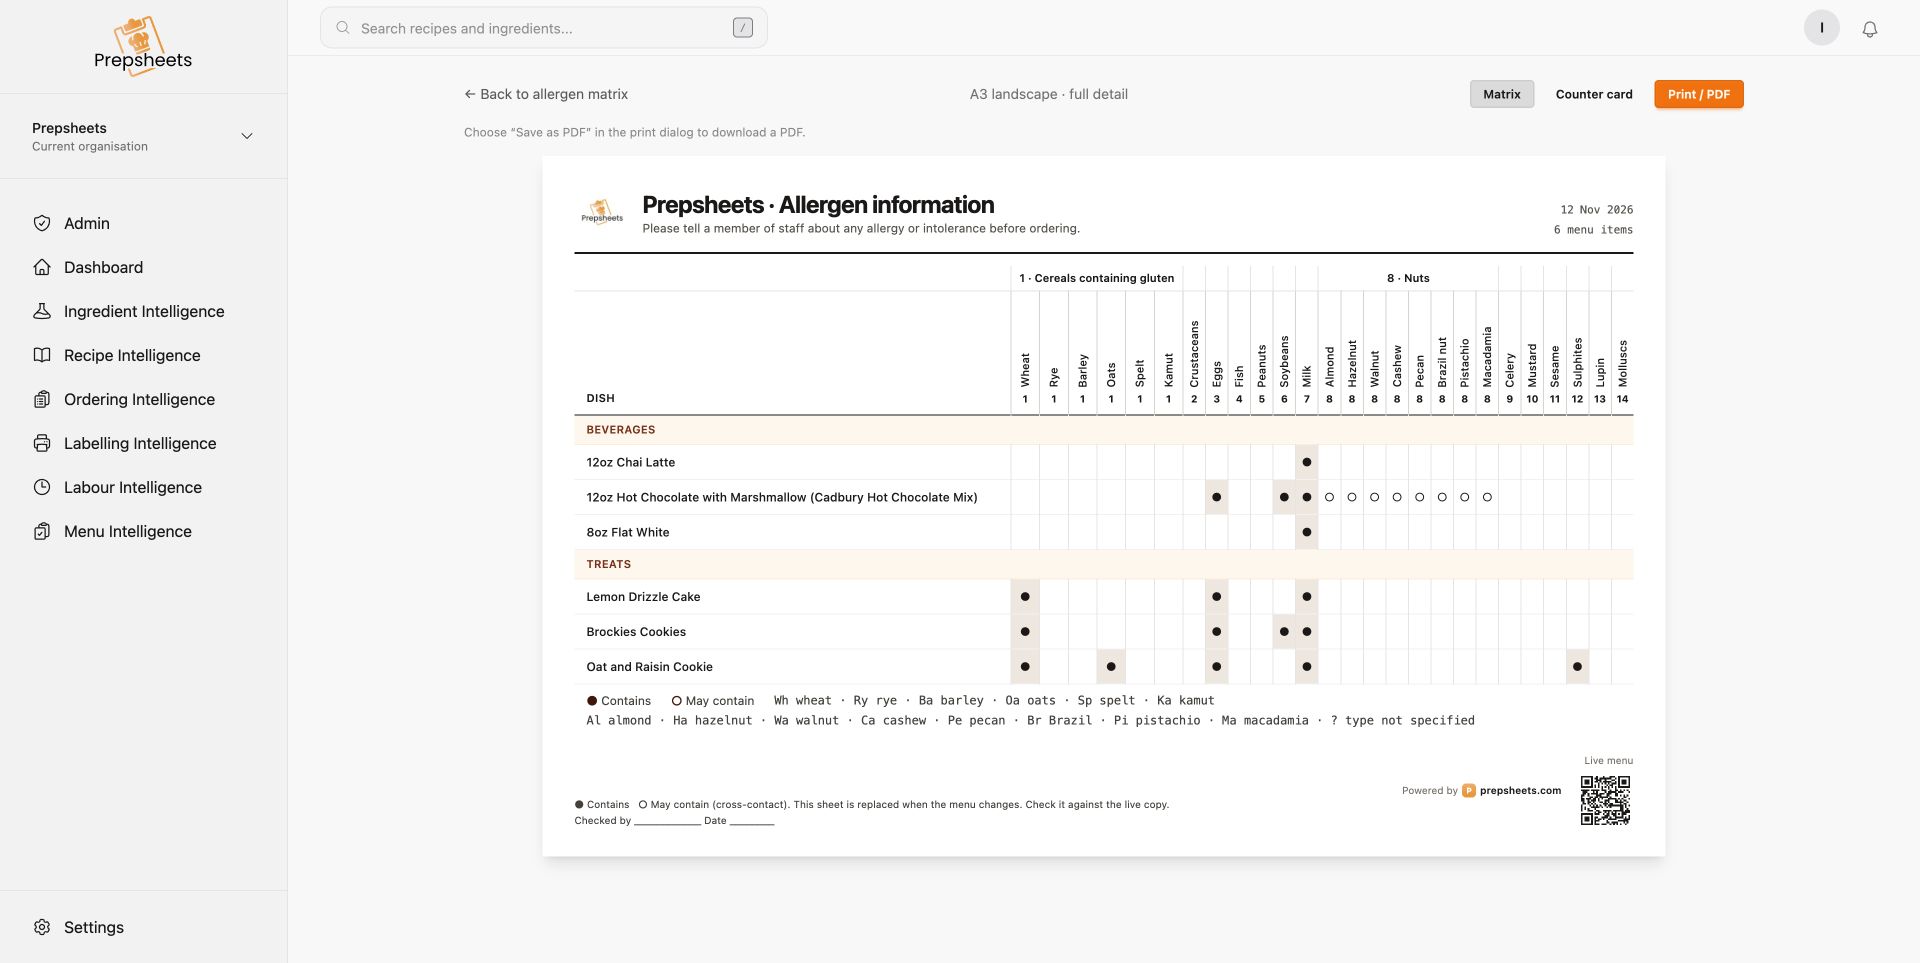
Select Print / PDF from the matrix screen to open the preview. Leave Matrix selected, then choose Print / PDF again to open your browser’s print dialog.
Choose your printer, or select Save as PDF. Check the preview, paper size and orientation before saving or printing.
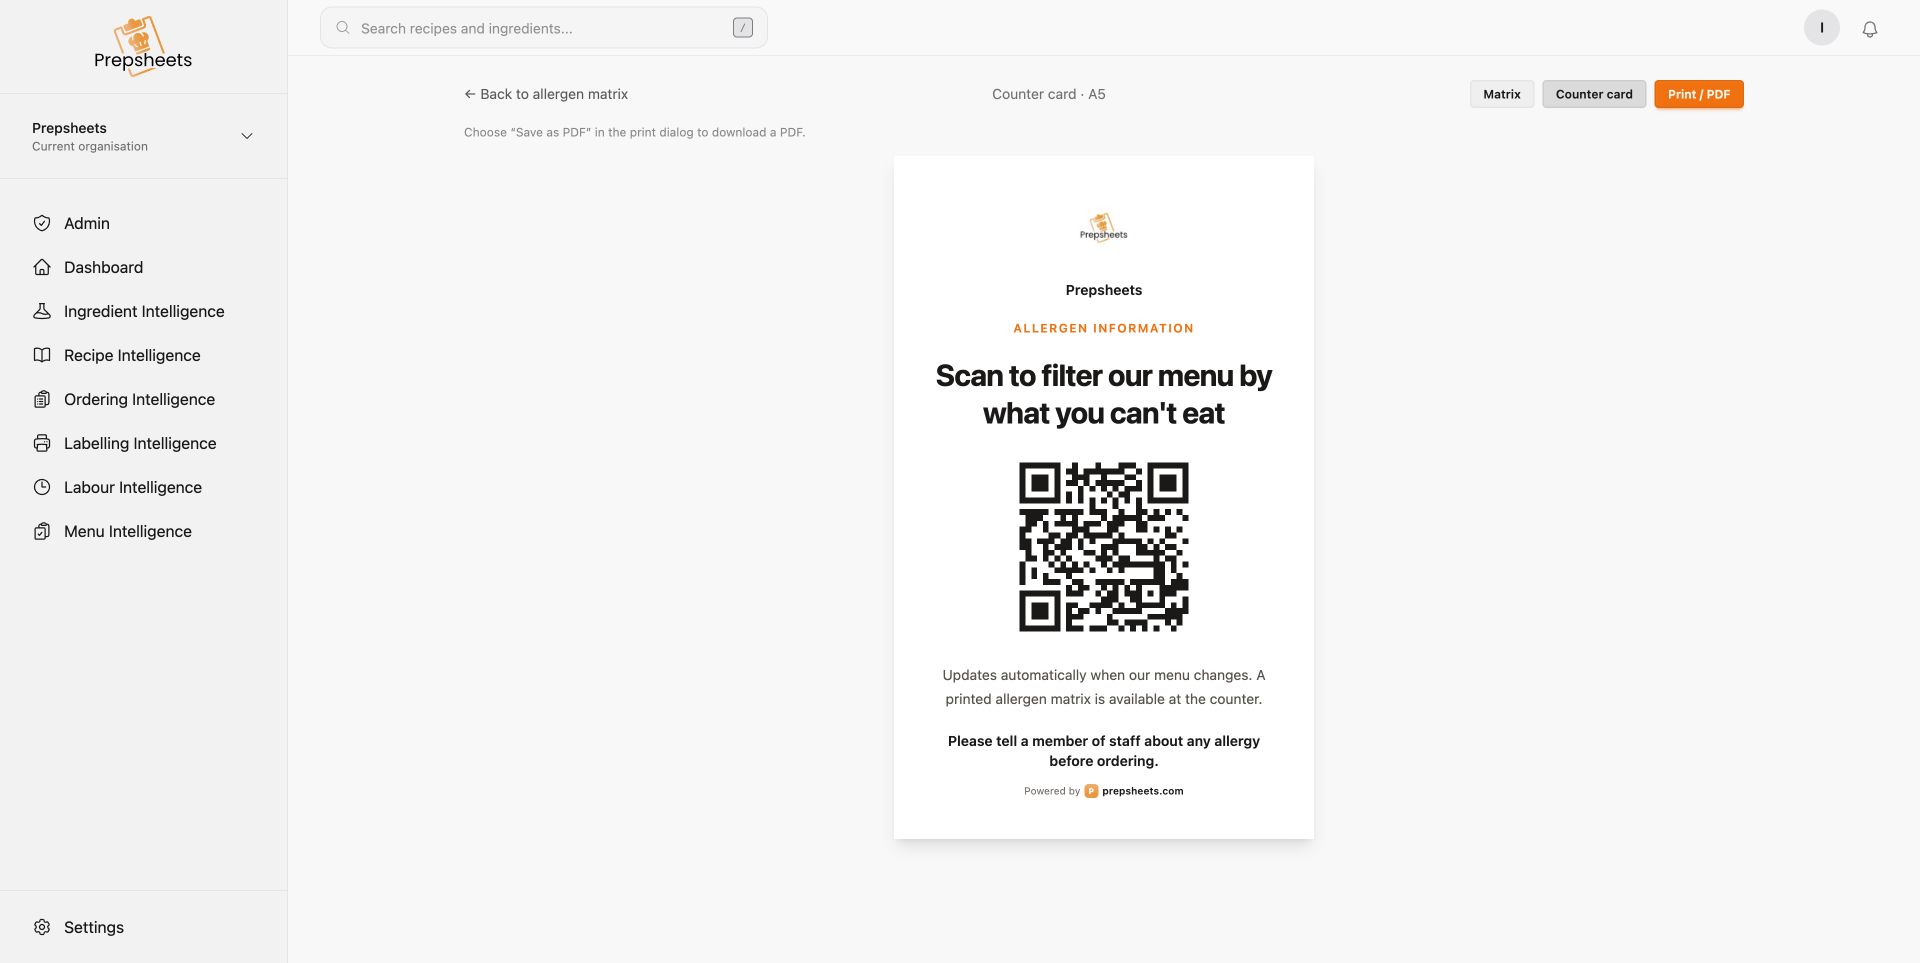
The printout includes the date, menu item count, legend, a place for a check/sign-off, and a QR code for the live menu.
6. Create a QR counter card or copy the live link
On the preview screen, choose Counter card. The A5 counter-card preview displays a QR code and asks guests to speak to staff about allergies. Choose Print / PDF to print it or save it as a PDF.
To share a link instead, go back to the matrix screen and choose Copy live link. Guests do not need a Prepsheets account to use the guest lookup.
7. Check what the guest sees
Open the copied link or scan the QR code. The guest page asks What can’t you eat? Guests can select the relevant allergens and see how the recorded menu information relates to that selection.
The example below selects Milk in our internal demonstration account. It is an example selection, not anyone’s personal allergy information.
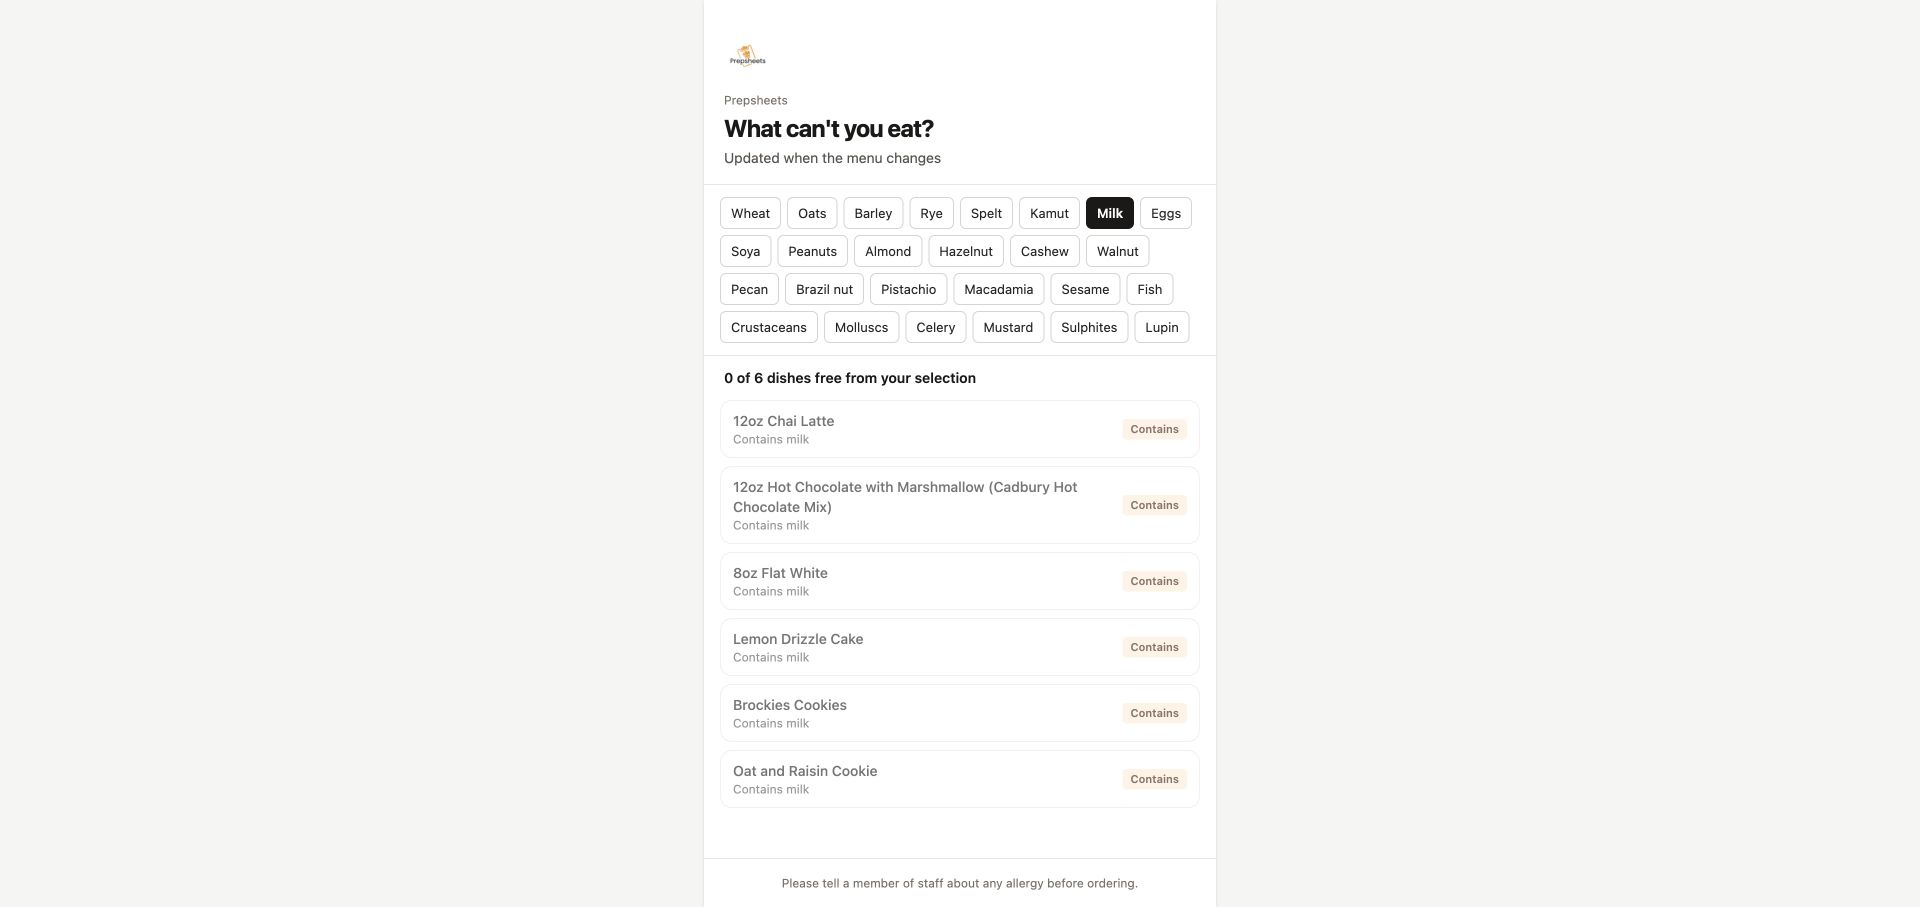
The guest page is a way to communicate recorded information. Customers should still tell a member of staff about an allergy before ordering, as the page itself asks. A blank matrix cell or a filter result should not be treated as a guarantee that a dish is safe for a particular person.
Keeping it current
Keep your ingredient declarations, supplier specifications and recipe ingredients current, and check your menu when dishes change. Open the live view again after changes to check the result. A paper printout or saved PDF is a snapshot: replace it when the information changes.
Quick troubleshooting
- A dish is missing: check that it is included in On Menu.
- A section heading is missing: check the dish’s menu section and Group by category.
- You need specific nut or cereal types: select Full detail and check the ingredient’s recorded type.
- There is a warning: use Fix in recipe and check the ingredient data.
- The printed copy differs from the menu: regenerate the matrix and replace the old printout.
Need a hand? Contact info@prepsheets.com.