Help Centre › Ingredients
Add Ingredients from the Managed Database
To add ingredients from the managed database, go to Ingredients, click Add Managed Ingredient, choose your supplier, and search by product code or name. Click Add on each product, then open the ingredient and enter the price you pay. Each managed ingredient arrives with its allergens, nutrition and product data already verified, so you don't type any of it by hand.
Before you can build a recipe you need ingredients — same principle as a regular kitchen. The best place to start is the managed ingredient database: thousands of supplier products that Prepsheets keeps verified and up to date for you, including prices, allergens and full nutritional information.
Two ways to add ingredients
From the Ingredients page (left-hand menu) you have two options:
- Add Managed Ingredient — browse and select from a supplier's verified catalogue. Best for getting started, and what this guide covers.
- Upload — import your own local ingredients from a CSV file. Covered in the next guide.
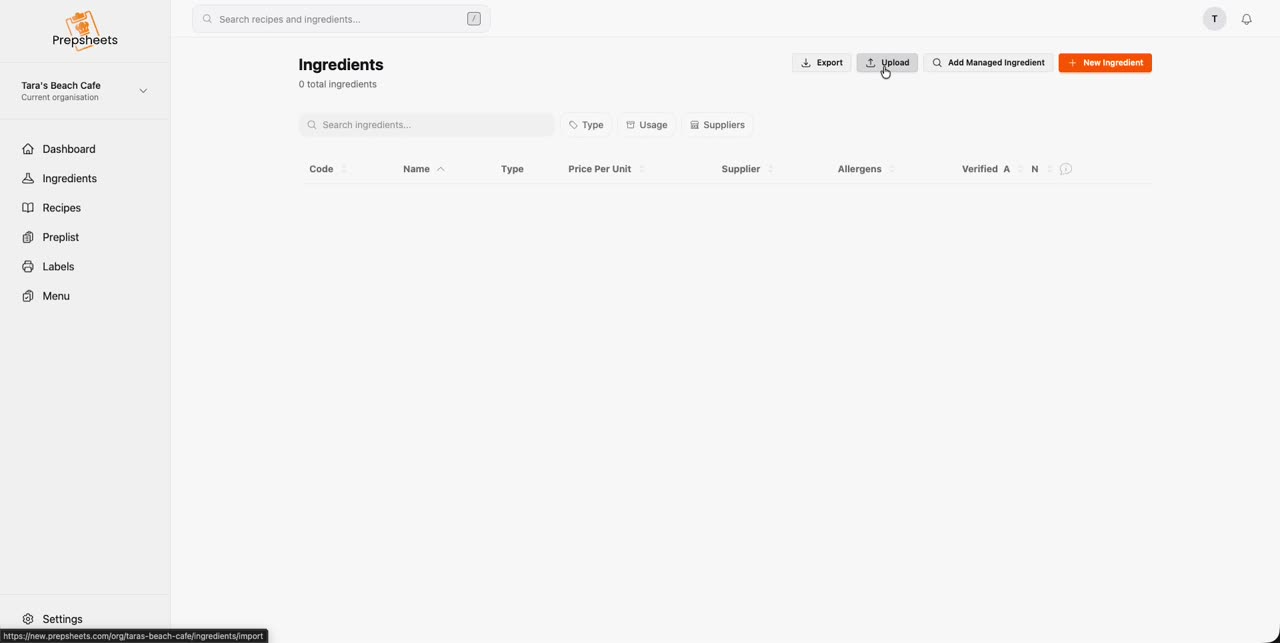
Step 1: Choose your supplier
- Click Ingredients in the left-hand menu.
- Click Add Managed Ingredient.
- Search for your supplier — for example, Musgrave — and select it.
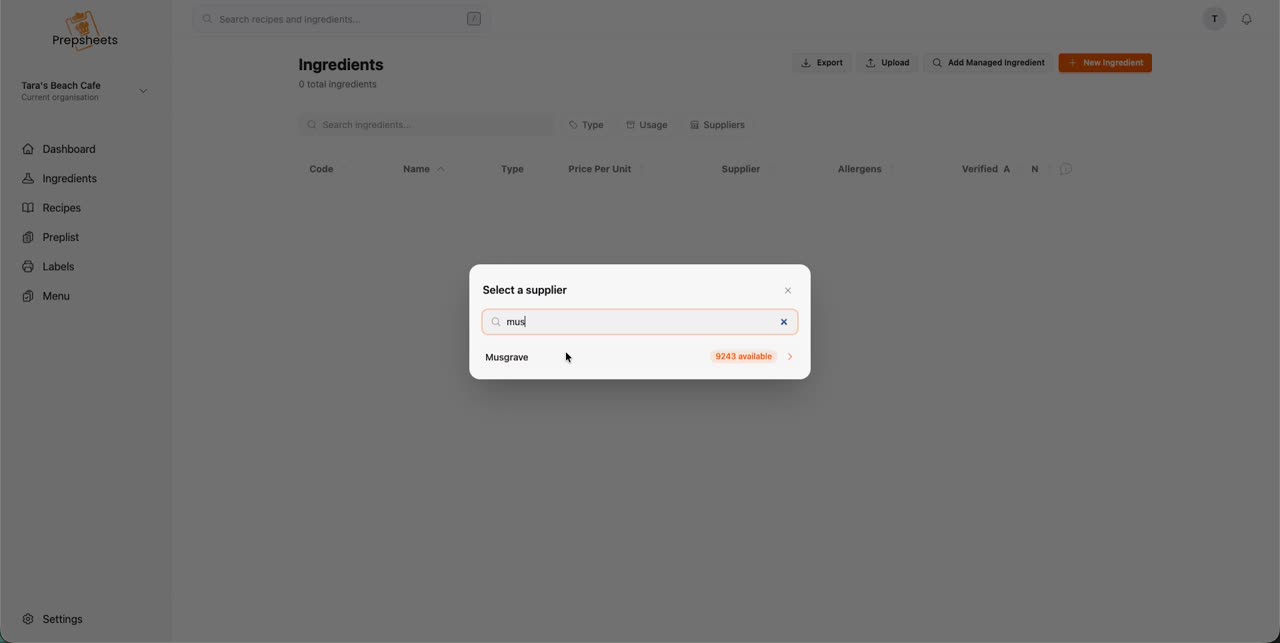
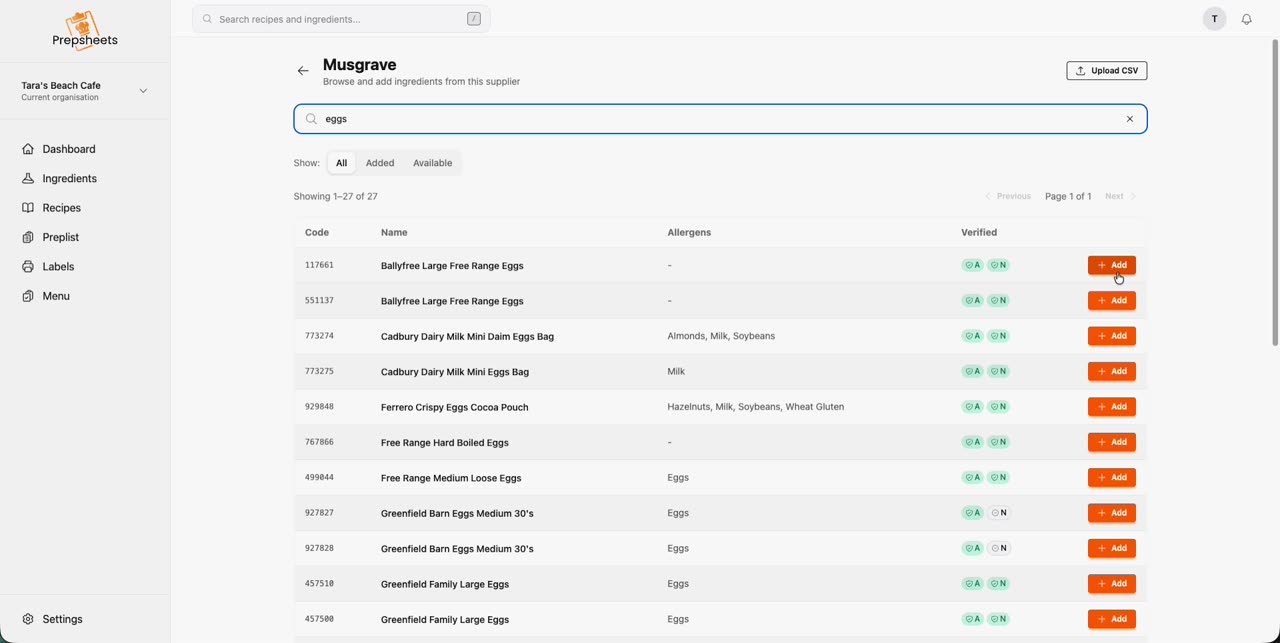
Step 2: Find and add products
You can search the supplier's catalogue two ways:
- By product code — fastest if you have an invoice or order sheet in front of you. Type the code and the exact product appears.
- By name — type what the product is, e.g. caster sugar, eggs, lemon.
Click Add next to each product you want. That's it — the ingredient is now in your organisation.
Step 3: Add the price you pay
A managed ingredient arrives with everything except your price — because what you pay your supplier is unique to your business. Open the ingredient and enter the price you pay for this product. That's what Prepsheets uses to cost your recipes and work out your margins, so it's worth doing as you go.
Step 4: What you get with a managed ingredient
Click any ingredient you've added to open its detail page. Because it's verified from the supplier's own data, it arrives complete:
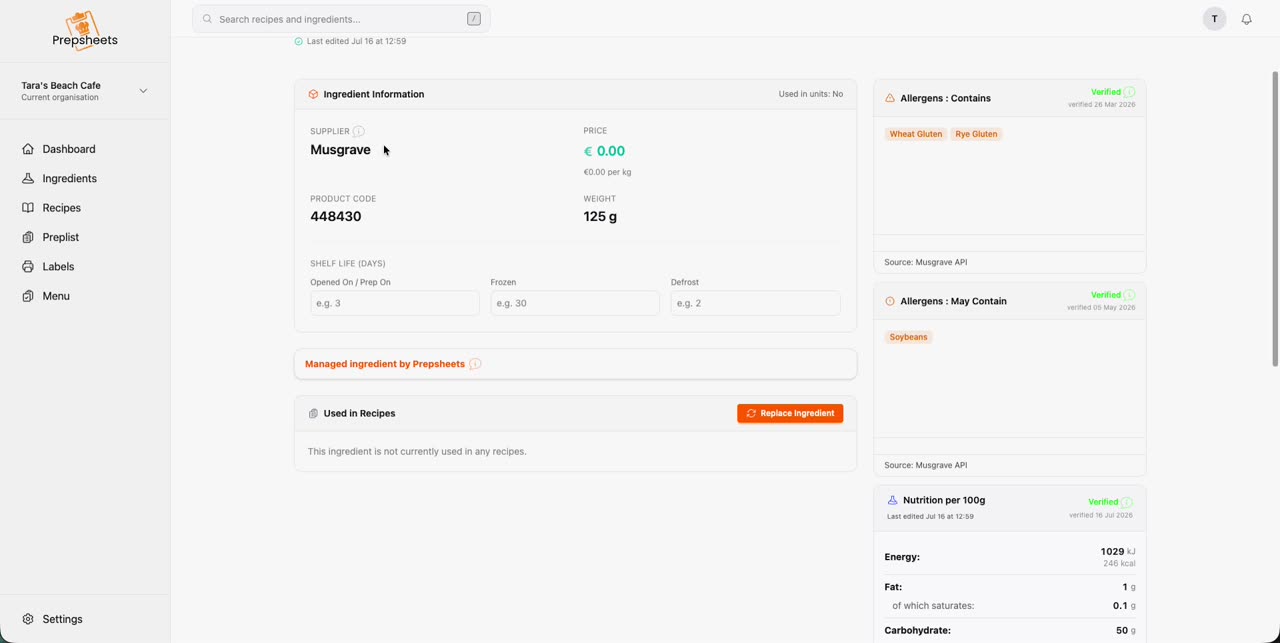
- Price and product code — including the supplier's EAN code, so you know it's exactly the right product.
- Allergens — split into Contains and May Contain, each marked Verified with the date it was last checked.
- Nutrition per 100g — energy, fat, carbohydrate, fibre, protein and salt, also verified and dated.
- Label information — the label name and the sub-ingredients that print on your food labels. See below.
What are Label Name and Label Description?
Scroll further down the ingredient page and you'll find the Label Information panel. These two fields control exactly how the ingredient appears on any label you print.
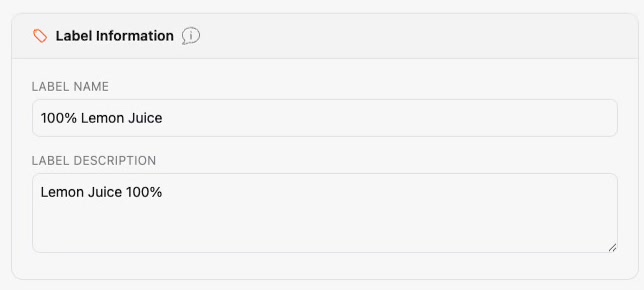
- Label Name — the name this ingredient is listed under on your label.
- Label Description — the sub-ingredients of that ingredient, i.e. what it's made of. If anything is listed here, it prints in brackets straight after the label name.
So an ingredient with the label name 100% Lemon Juice and a label description of Lemon Juice 100% prints as:
100% Lemon Juice (Lemon Juice 100%)
A product with more than one sub-ingredient works the same way — a frozen baguette listing wheat flour, water, rye flour, yeast and salt prints all of those in brackets after its label name. This is what keeps your finished labels compliant, because every component of every ingredient is declared.
All of this flows automatically into your recipes — and prints on the food labels you generate from them. You never have to type in allergen or nutrition data for a managed ingredient.