Help Centre › Getting Started
Create Your Account & Set Up Your Organisation
To get started with Prepsheets, go to prepsheets.com and click Free Trial to start a free 14-day trial (no credit card needed), confirm your email, then set up your organisation — your business name, country, currency, measurement system, wastage, margin alert and default shelf lives. It takes about 5 minutes and leaves you ready to add ingredients.
This guide takes you from the website to a fully set-up organisation, step by step.
Step 1: Start your free trial
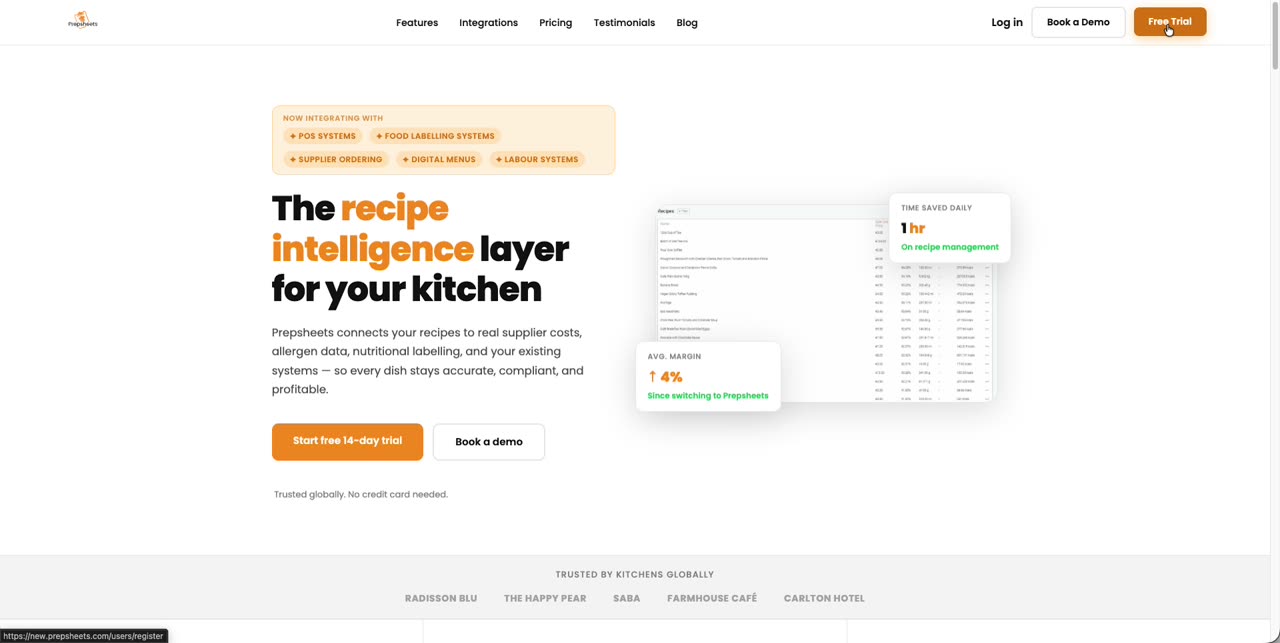
- Go to prepsheets.com and click Free Trial (top right).
- Fill in your name, email address and phone number.
- Tick the box to confirm you've read the Privacy Policy and Terms of Service, then click Sign up.
Step 2: Confirm your email
- Open the confirmation email Prepsheets sends you and follow the link.
- Click Confirm and stay logged in.
Step 3: Set up your organisation
You're now logged in, and Prepsheets asks you to create your organisation — this is your business: your café, restaurant, bakery or production kitchen.
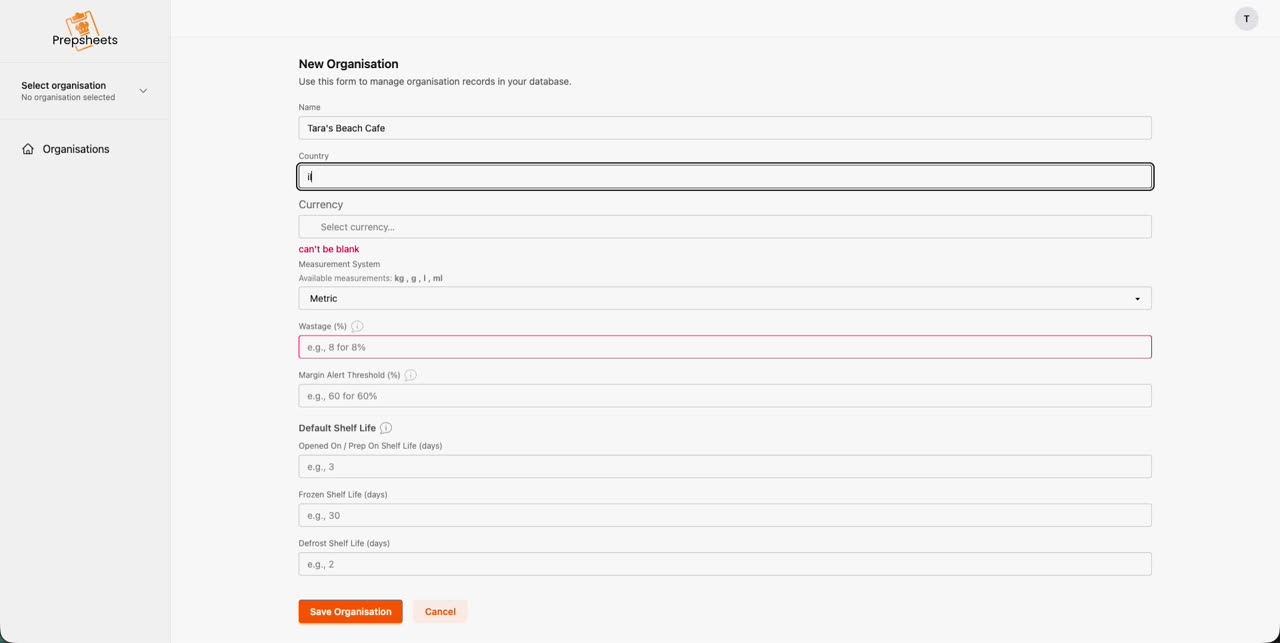
- Name — your business name.
- Country — the two-letter country code, e.g. IE for Ireland, GB for the UK, DE for Germany.
- Currency — the currency you buy and sell in.
- Measurement System — Metric gives you kg, g, l and ml.
- Wastage (%) — the wastage Prepsheets builds into every recipe cost. Not sure? 5% is a sensible starting point, and you can fine-tune per recipe later.
- Margin Alert Threshold (%) — if a recipe's margin falls below this figure, it shows in red so you spot it immediately. For example, enter 75 for a minimum 75% gross profit margin.
- Default Shelf Life (days) — these feed into your food labels: Opened On / Prep On: 3 days, Frozen: 30 days, Defrost: 2 days. These defaults suit most kitchens, and you can override them per ingredient or recipe later.
- Click Save Organisation.
Step 4: Select your organisation
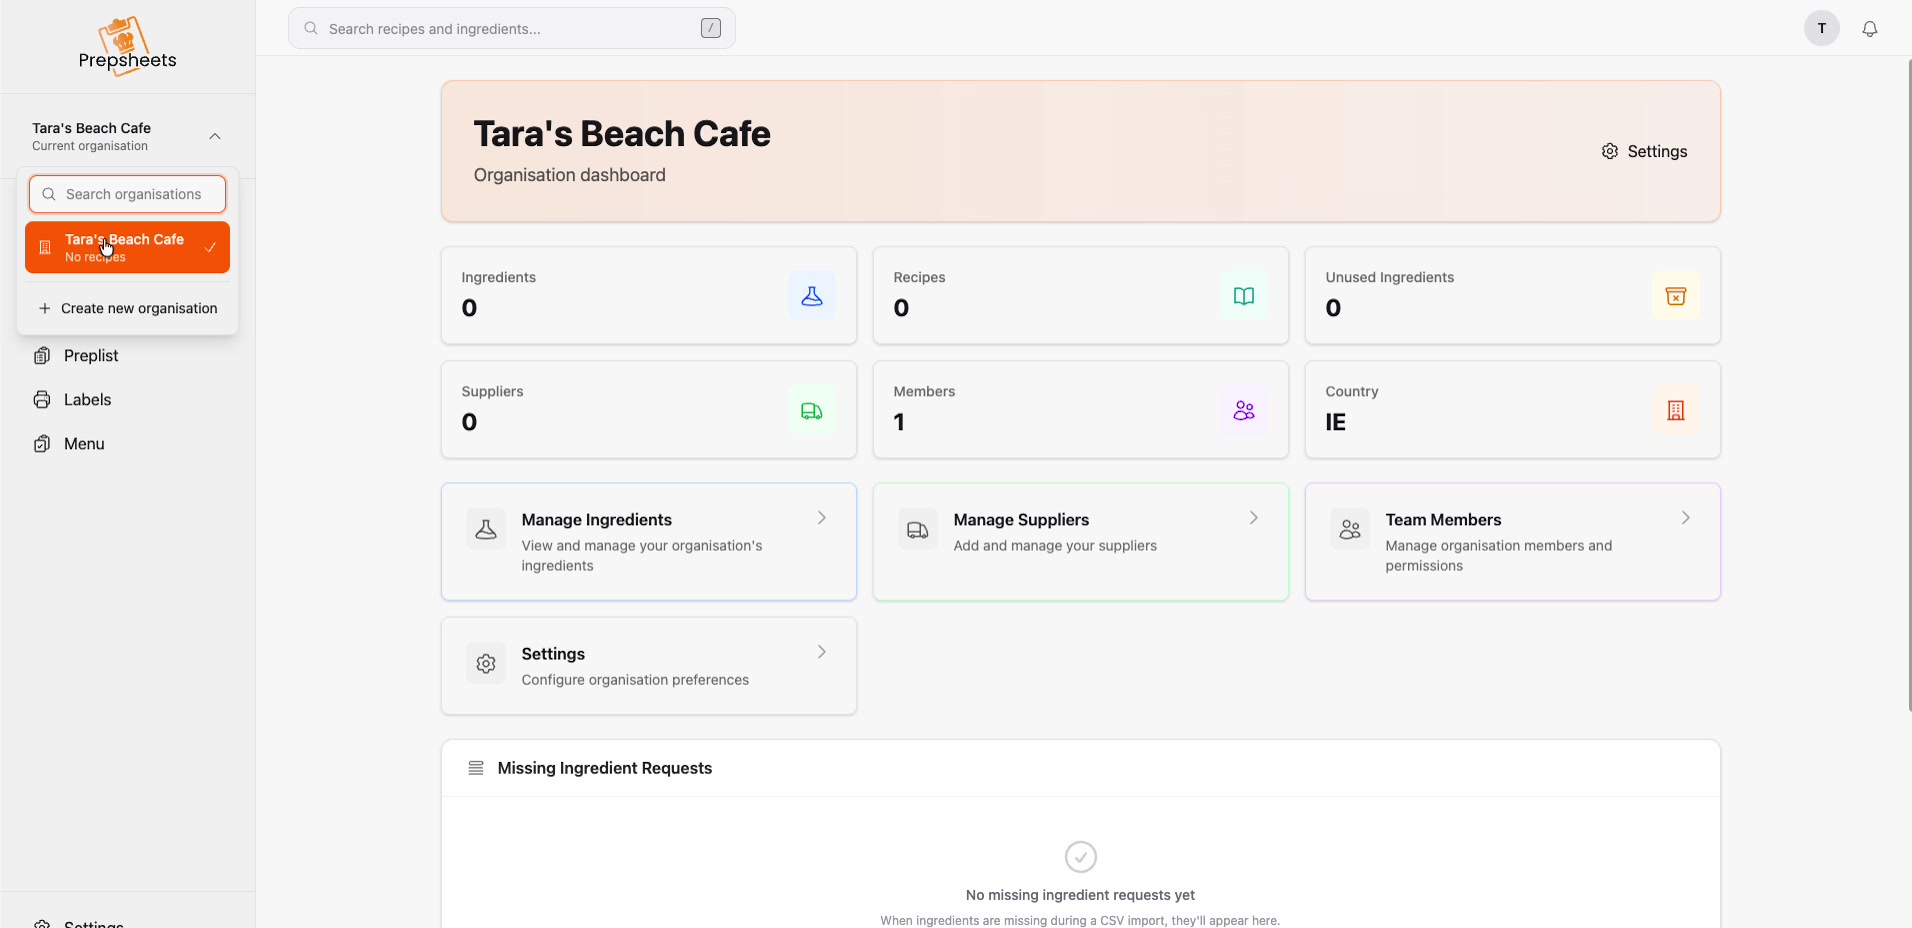
Your organisation now appears on the left. Click the organisation selector (top left, under the Prepsheets logo) and choose it to open your dashboard. It's empty — 0 ingredients, 0 recipes, 0 suppliers — which is exactly right for a brand-new account. From here you'll fill it up.